Offer Manager
To access Offer Manager, navigate to Communications and pick the Offer Manager icon.

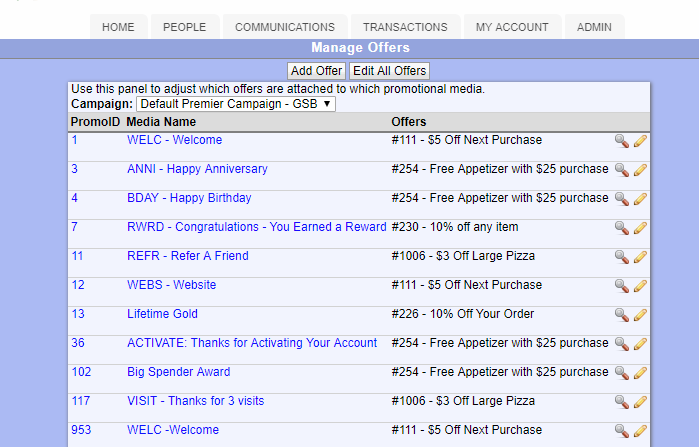
This screen shows you, by campaign, which offers are attached to each triggered message.

Use the drop down at the top to select a campaign. Your default campaign should be pre-selected.
You can click on the PromoID to see the e-mail message associated with that trigger. Click on the "Media Name" to see the landing page with the offer.
To change the offer(s) associated with a particular trigger, click on the "Edit" pencil.
Note: This is not the only way to link offers to campaign messages. Learn more about how to do this from the Campaign Manager screen.

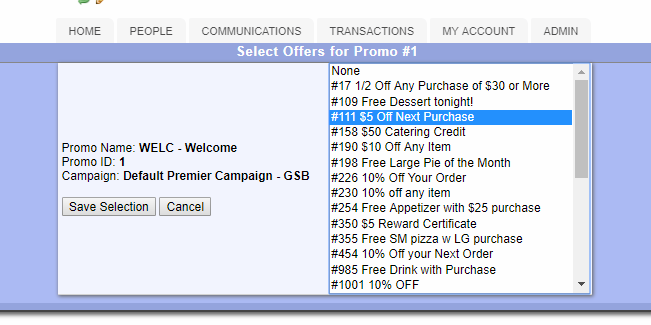
From here, you can select 1 or more offers. To select multiple offers, use the CTRL key when selecting.
Save or Cancel your changes.
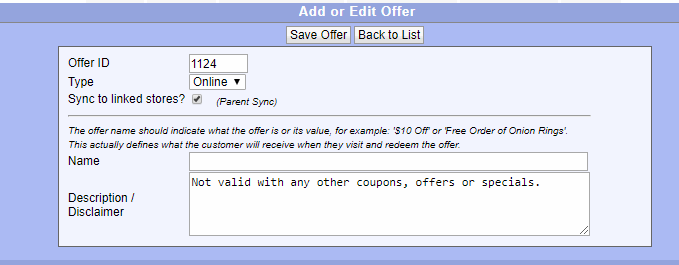
From here, if you need to add an offer, click the "Add Offer" button at the top of the Offer Manager screen.

The OfferID will default to the next available ID, but if you are linking to an offer in your POS system, be sure to enter the proper POS ID or PLU #.
The offer type is not used.
Check the "Sync to linked stores" if you want to keep all your related locations in sync with the same offer.
Enter an offer name that will be short & customer friendly.
Enter an offer description to tell your customer more details or restrictions.
Save your offer.
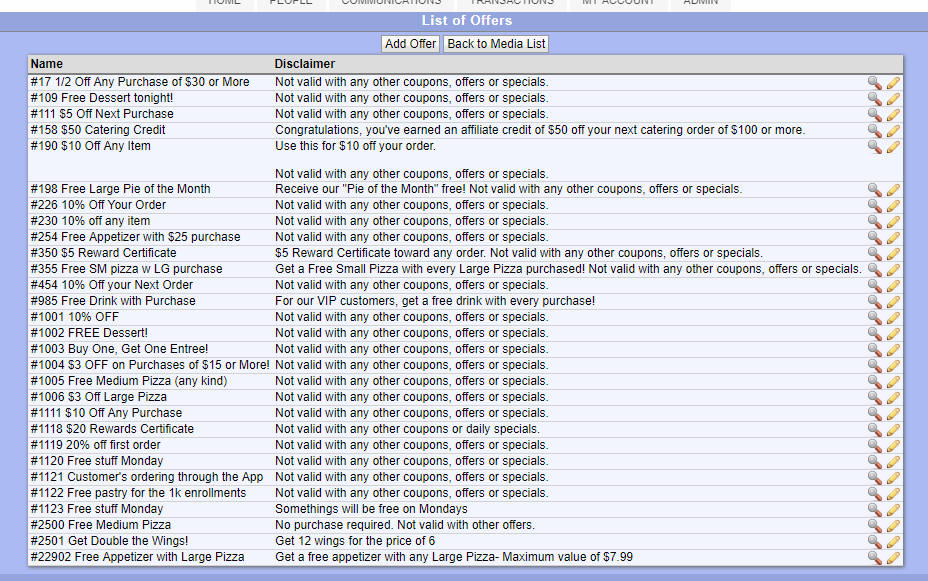
Click on the "Edit All Offers" button at the top of Offer Manager to see a list of all the offers in the system. From here you can view or edit the details.

