Sending An Email Broadcast
Here's How:
https://youtu.be/dS47sfrfkowhttp://
Video URL: https://youtu.be/dS47sfrfkow
To get started with an Email broadcast, navigate to Communications and choose the Broadcast icon.
Select A Template or Start Blank
You'll see a list of E-mail templates to help you get started. Some of these are generic templates for holidays or special occasions that you can customize. You should also see at least one template customized with your logo and color scheme. Select a template to use and press the "Use Template" button at the bottom of the screen.
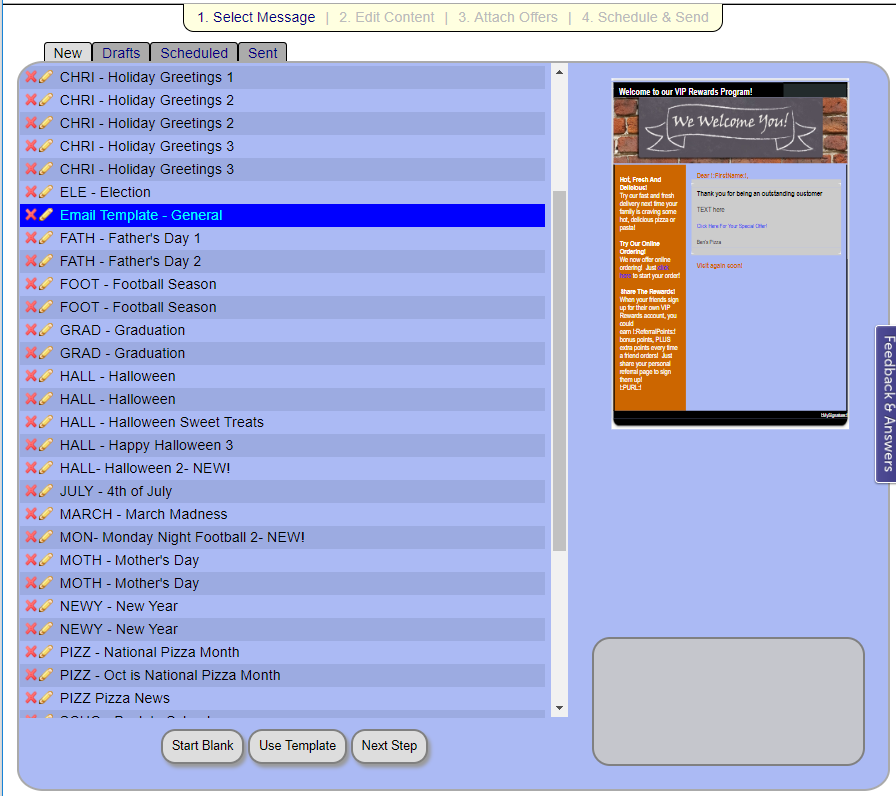
If you prefer not to use a template, press the Start Blank button to move on to the next step.
Tip: If you want to edit the template itself before using it, click on the pencil icon next to the template.
Customize Your Content
Next you'll see the Edit Content screen. At the top of the screen is the Email subject line. A compelling subject line is key to getting customers to open your email so spend some time thinking of a good one.
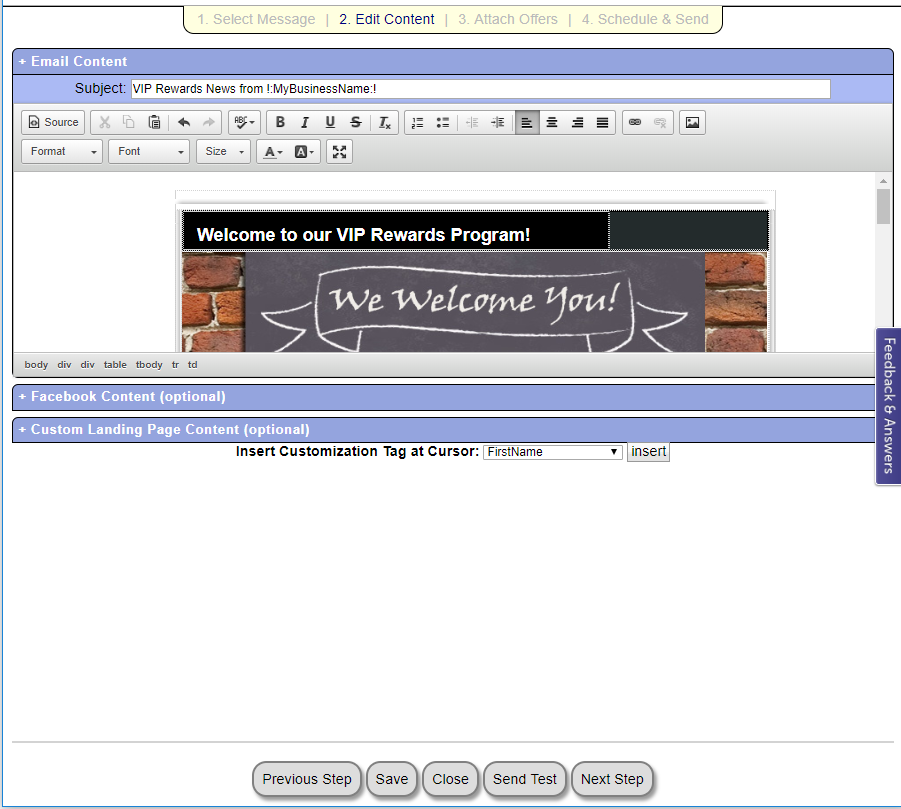
Adding personalization can be a great way to attract customer attention. At the bottom of the screen you'll see the "Insert Customization Tag At Cursor" option. Place your cursor in the subject line, then insert the First Name.

To make it easier to customize your e-mail content, click on the screen maximize button in the "Edit Content" toolbar.
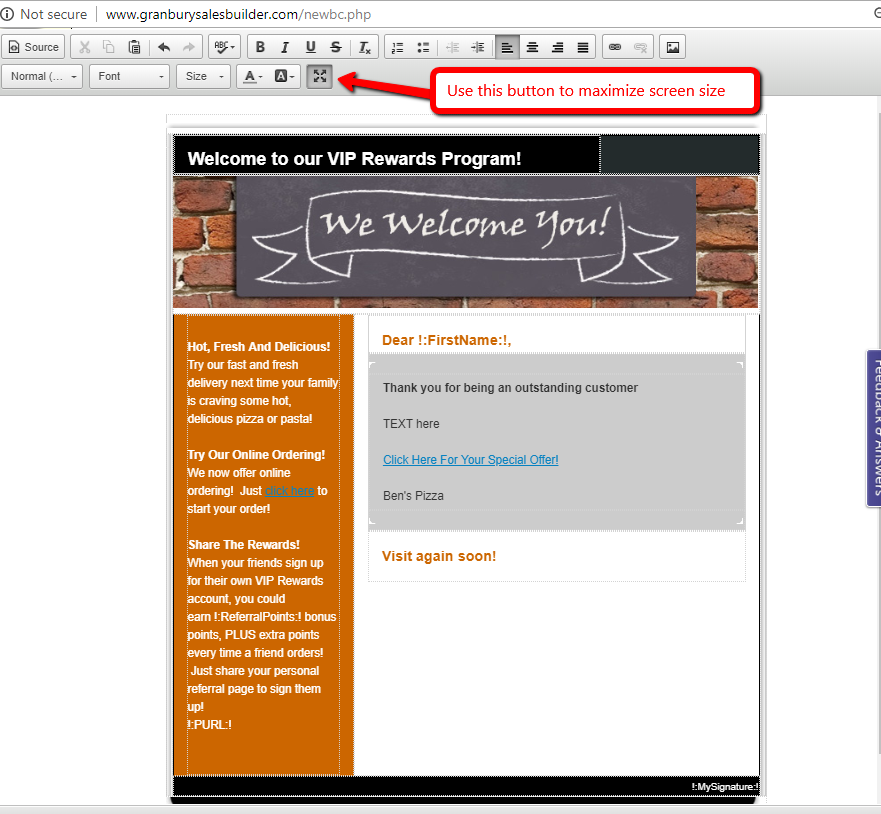
Adding A Landing Page Link: The Landing Page is the web page your customers will go to if they want to see the details of their offer. If you are planning to send an offer with your e-mail, you can describe the offer in the e-mail and include a link so customers can see the coupon page. Use the "Insert Customization Tag" at the bottom of the screen to add the LandingPage option to the body of your e-mail.
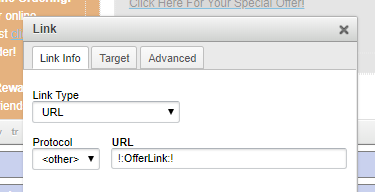
You can also type text in your e-mail, like "Click Here For Your Personal Coupons" and then link that text to the Landing Page. Highlight the text and click on the "Link" icon in the toolbar. For the Link Type, choose URL. For the Protocol, choose <other>. For the URL type !:OfferLink:!.
Alternatively, you could add a link directly to the customer's rewards page on Thrive Online, so they can easily start an and order and redeem their offers. Read More.
Adding An Image: If you want to add an image to your email, click on the Image icon in the Edit Content toolbar. On the screen that pops up, you can directly enter a URL if the image you want to use is already on your website. If not, you'll probably want to click on "Browse Server" to upload and select an image.
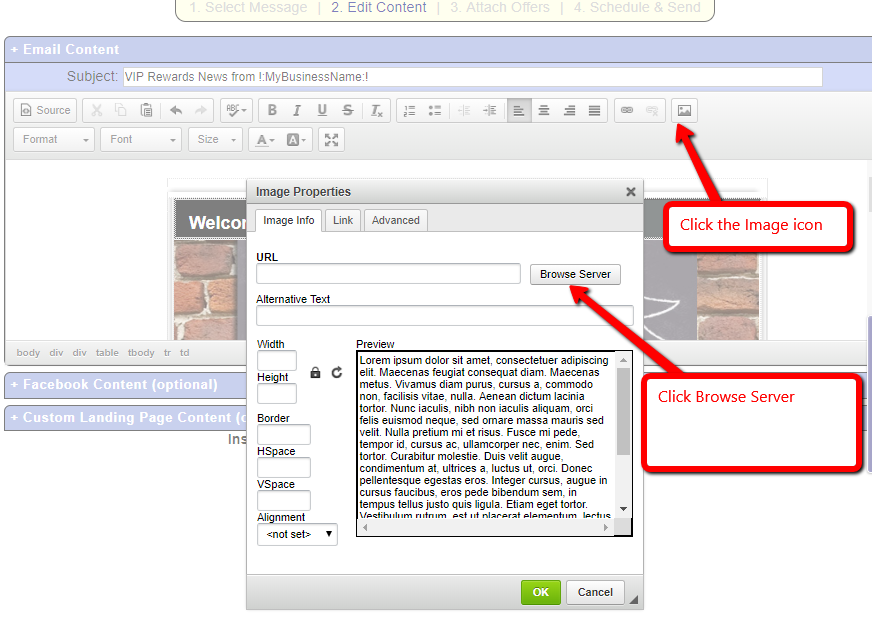
It's always a smart idea to enter the Alternative Text as a description of your image, in case some customers have image loading turned off in their email.
If you want your image to link to the landing page, click on the image, click on the Link icon in the toolbar, and follow the instructions above for adding a Landing Page link.
Press OK to add the image to your email.
When your e-mail is done, press the "Maximize" button again to return to the Content Editor.
Optional Content
Below the E-mail content are two optional content boxes.
Facebook Content: If you've connected your Facebook account, you can publish a post to Facebook from here when your e-mail is sent. Learn More.
Landing Page: The landing page is the webpage customers will see if they click on an offer. You can add an image or header that will appear before the coupons if you want to customize this experience.
Attach Offers
If you wish to attach specific offers to this broadcast, click "Next Step" button or click on 3. Attach Offers at the top of the screen. When you attach an offer, each customer who got the broadcast will receive the offer in their account, so it will appear in the POS system, online ordering, mobile app, etc.
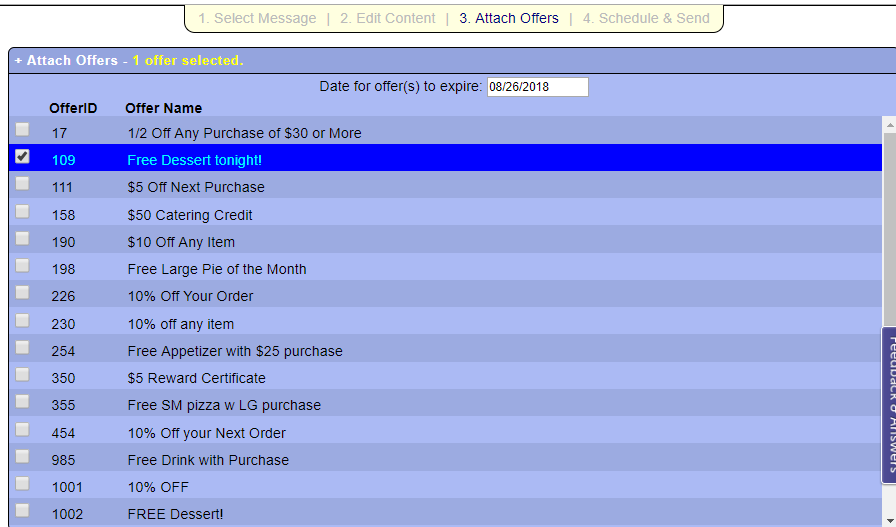
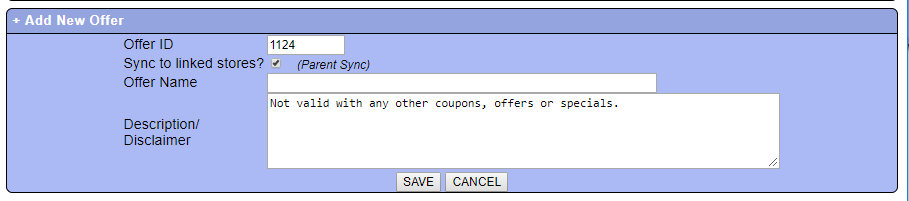
Select one or more offers to attach. You can change the default expiration date. If you need to add an offer, expand the Add New Offer section. You can enter the offerID (Remember, it should match an Offer PLU in your POS system), Offer Name and Description.
Click on Next Step
Schedule & Send
The first step in finalizing your email is to give it a name. This will help you identify it in reports. If you wish to save this email as a template for future use, you can do so here.
https://dfxwi94ana2j9.cloudfront.net/SB_Broadcast_Name.png
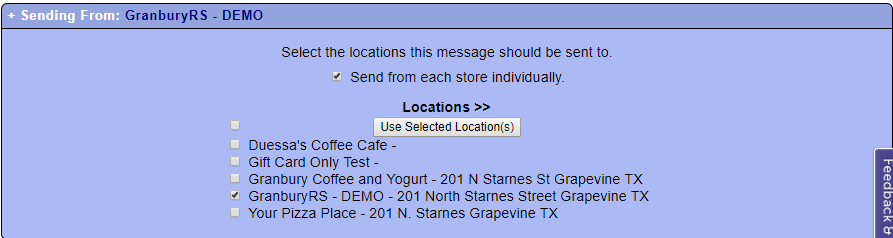
Sending From: If you have multiple locations, you can choose which locations are included in this broadcast. Click the Locations link to expand the list. Check the "Send from each store individually" if you want the e-mail to appear to be "From" the individual store.
Sending To: The Sending To section lets you decide who will get your e-mail. By default we pick the Engaged customers list. An Engaged Customer is someone who has joined, opened an email, or posted a transaction within the past 6 months. Keeping disengaged customers off your list will help to improve your deliverability rates (Learn more).

You can further filter your customer list by selecting from some pre-set filters, or using campaign, affiliation or tag status.
Scheduling: Choose to send your broadcast immediately, or schedule it for a future date.

Once you are all set, be sure to SAVE your message using the save button at the bottom of the screen. You can send a test - just enter your e-mail into the pop up that appears after pressing Send Test. When you are all ready to go, press "Send".
Reviewing Saved Messages
When you first open the broadcast screen (or click on 1. Select Message), you'll see tabs at the top. The New tab lets you start a new message.
The Drafts tab lets you edit any message that was saved but not scheduled or sent.
The Scheduled tab lets you see pending scheduled messages, you can edit them as long as they are in the Scheduled status.
The Sent tab lets you see all the messages that were sent. Click on any sent message and you'll see some results in the bottom right. Don't forget you can look at the Media Performance report to see how an email performed.
At the bottom of this screen you have the option to "Clone" any message if you want to copy it for a new broadcast.