Account Settings
The Account Settings area of SalesBuilder is where you can customize many aspects of your loyalty program. Navigate here by clicking in My Account and choosing the Account Settings icon.

Account Settings - General
At the top of the screen are buttons for several functions:
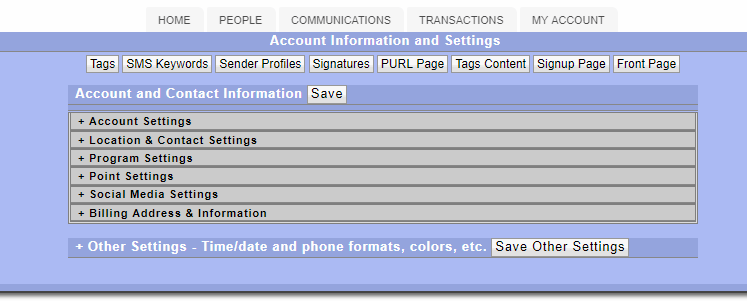
Tags: Allows you to customize the tags you wish to track for customer demographics. Learn More.
Sender Profiles: Allows you to customize the name, email address and reply-to address for your messages. You may wish to set your "reply to" to an email you regularly monitor, rather than using the SalesBuilder system e-mail.

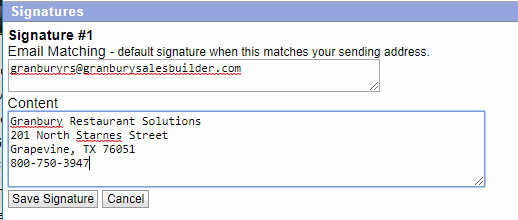
Signatures: Allows you to set up a signature (such as your company name, slogan, address and phone #) which can be added to e-mails.
PURL Page: Each customer in your program gets their own personal URL for referrals. This is called the PURL page. You can customize the HTML header of this page to let prospective customers know what they will be signing up for. Learn More
Tags Content: If you have set up custom tags that you'd like to have customers select (for example, are you interested in Vegetarian? Gluten Free? Catering?) these tag checkboxes will appear on the customer profile. The Tags Content is the header to this area so you can explain to customers what you will use this information for.
Sign Up Page: The sign up page is what customers who visit your website will see. Learn More about customizing it.
Front Page: The Front Page can be shown when people navigate directly to your rewards URL. This allows you to customize content to explain your program and give a link for people to Log In or Sign Up. If you don't save any front page content, customers will be directed to the sign up form.
Account Settings
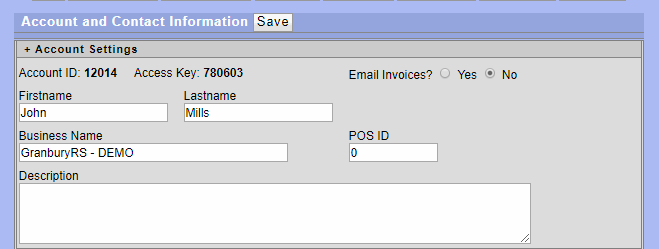
The first section titled Account Settings can be expanded to show your basic company name and contact information. The accountID and Access Key are typically used for your POS integration. The POS ID is not used.
Location & Contact Settings
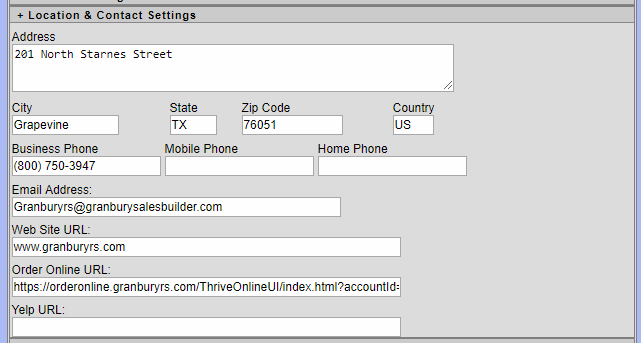
Detailed location address, phone information is stored in this section. Your e-mail address should reflect the address you will send from. The web site URL is your company website. Online Ordering and Yelp URL are optional - these are all used to merge into e-mails when needed so you don't have to enter every time.
Program Settings
Expand the program settings to see several more configuration options.
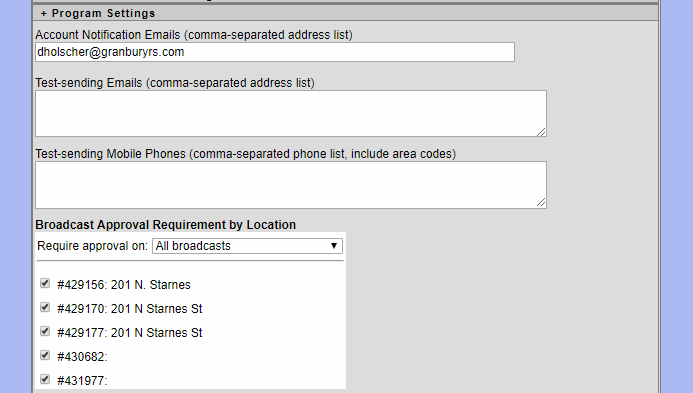
Account Notification Emails: Enter a personal e-mail that you will receive, so that you will get information about your program.
Test-Sending Emails: Enter the e-mails that should receive any tests of new messages or broadcasts for review before sending out.
Test-Sending Mobile Phones: Enter the phone # of any phones that should receive tests of new text messages for review before sending out.
Broadcast Approval Requirement: Choose how you want to use the broadcast approval feature to control what individual locations send out. Learn More

Rewards Program URL: Enter the rewards domain registered for your program. Note: Do not change this domain without checking with your account manager. Each domain requires additional configuration for e-mail validation, SSL certificates, etc.
Sign up page background: Choose a color for your default background on customer-facing pages.
Default first name: Enter a name to use for personalized emails for records without a first name
Avoid using phone as card number for SMS/Web signups: Typically a web sign up will use the phone # as the card ID if available. This is preferred however if you don't want to do this, check this box and a negative card ID will be issued.
Number of extra birthdays to allow: Choose to allow customers to enter family member birthdays for "extra birthday" rewards.
Disable Birthday Edits: Check this box to prevent customers from changing their birthday after they've entered it (this avoids them changing it every month to get a new birthday reward).
SMS Settings:
If you have SMS text messaging activated for your account, enter a short phrase that customers can use to join your program. If you will be using a shared short code, make sure that the phrase includes your restaurant name, such as XYZpizzareward. It must be unique to the system.
If you choose to show the e-mail field on the mobile sign up form, you will also capture e-mail addresses, and customers will be set to e-mail as their preferred communication method. The customer can switch to Text on their profile page.

Profile & Sign Up Fields:
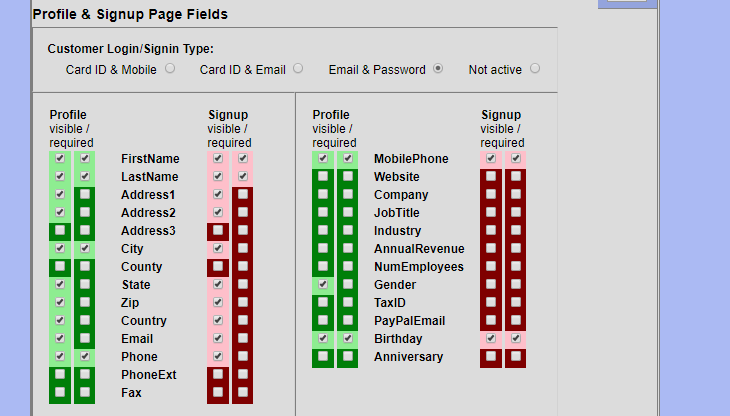
Customer Log In / Sign In Type: If you'd like to allow customers to log in at any time to see their point balances and rewards, choose a sign in method. If you are using loyalty cards, they can use their card plus email or mobile #. OR, use E-mail and set a password. If set to Not Active, customers will still be able to access their account from links within the e-mails you send them. Learn More
Below this, you can choose which fields are visible and required on the sign up page and the profile page. The customer must fill out all required fields on the profile before they can see the rewards landing pages or be "activated". However, if you include a reward with your welcome message they will still be entitled to that reward via in store or online redemption. We recommend that you minimize the fields on the sign up page to make it easy for customers to sign up! Learn more about customizing your sign up page.
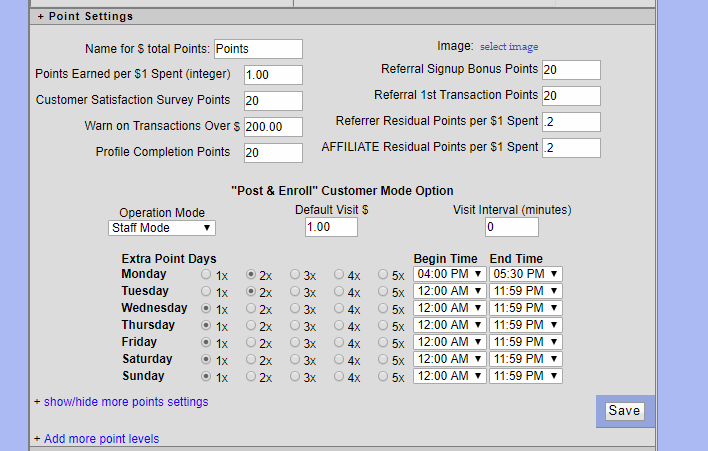
Name for $ total points: Enter a name for what you call Points (RewardBucks? Dining Dollars? PizzaCash?)
Points Earned Per $1 Spent: Each transaction will round to the nearest $. You can issue 1 point per dollar or any variation.
Customer Satisfaction Survey Points: Enter bonus points issued for completing a survey.
Warn on Transaction Over: This is for manual transaction posting, to avoid a colossal mistake.
Profile Completion Points: Enter bonus points issued for completing the profile.
Image: Select an image to represent your points program on the customer profile page.
Referral sign up bonus points: Enter bonus points given to a member who refers another member.
Referral 1st Transaction Points: Enter bonus points given to a member when their referral has a transaction.
Referrer Residual Points per $1 Spent: Issue points to the referrer for every transaction their referral makes (this is typically a fraction such as .1)
Affiliate Residual Points Per $1 Spent: Issue points to the affiliate organization for every transaction their associates make (this is typically a fraction such as .1) Learn More about Affiliates
Post & Enroll Customer Mode Option: The Post & Enroll option allows you to set up a customer facing iPad (or staff facing). This is typically used when there is no POS integration. Set a default visit $ to use rather than actual transaction $s, or just base your program on total visits. The Visit interval controls how often customers can check in. Learn More about this mode.
Extra Point Days & Times: Here you can decide if you want to give double, triple or up to 5x more points on certain days of the week or during certain times of day.
Show / Hide More Points Settings: Click this to use the "Extra Point Buckets" feature. Learn More
Add More Point Levels: Customize your program with graduated point levels that customers can earn their way into - sort of like the airlines with their gold / platinum / executive levels. Learn More
Social Media Settings
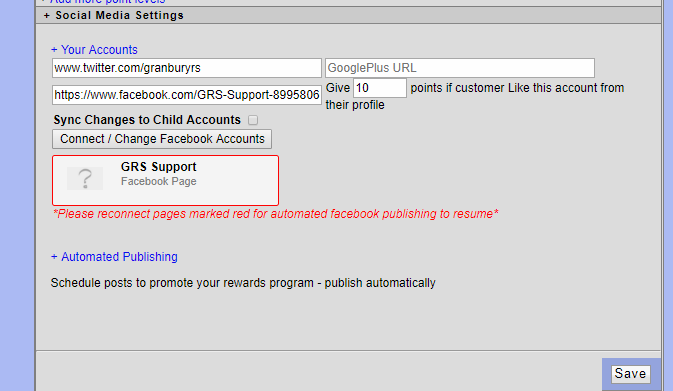
The Social Media Settings section allows you to enter your Twitter, Facebook and Google Plus account links. These will be automatically merged into e-mails when you use the merge field, saving you the time of adding them each time.
Reward customers with extra bonus points if they "Like" your Facebook account when filling out their profile.
Here you can also link to publish posts to your Facebook account automatically to periodically promote your rewards program. Learn More
Billing Address & Information

Fill out your billing information if it is different from the information above (Optional)
Other Settings
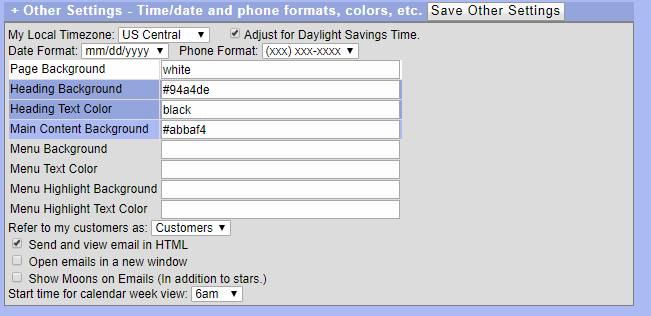
These miscellaneous settings let you customize the look of the SalesBuilder application. The local timezone is useful as it controls how broadcasts are scheduled. The rest are optional and do not need to be changed.
